Hi peeps!
I'm a little late on posting this but I recently went Halloween makeup shopping and wanted to share some of the items I purchased with you. Click below to watch my "Shop & Tell."
You can find the products below at http://shop.cinemasecrets.com/
Party Girl (Katy Perry) Wig -- So fun! The wig looks great out of the bag and the curls are easy to manage.
Flesh Latex-- Works great. I dribbled some onto my face and neck for a "melted skin" appearance on Halloween eve and it totally worked. I just dabbed on some concealer in my skin tone on top and it was good to go.
Super Sealer spray -- I sprayed some over mine and my fiance's Halloween looks and it worked pretty well. I also used some recently for a maternity painting and it worked so good that I got a text from the mom-to-be the next day saying the painting was STILL on!
Black lipstick-- I was SO bummed because this Cinema Secrets-brand lipstick came out super sheer and looked like Clinique's Black Honey lipstick shade.
Glow in the Dark Body Gel-- Total waste. It smelled funny and felt gross. And didn't even glow.
You can find the products below at http://www.naimies.com/
Elegant Lashes-- According to a trusty friend, these lashes are from the same distributor as MAC's eye lashes. I have to agree because they went on just like MAC's lashes do and worked fabulously. $2.99 a pair and probably the best purchase I made all day.
Beauty Blender-- This adorably bright pink teardrop-shaped little wonder is amaze-balls. My foundation has never looked better. I absolutely love the pointy end to get into the nooks and crannies (like around your nose and eyes). The best part is that this sponge, unlike others, actually washes out and is reusable. And it better be, for $18 a pop!
MUF Eyebrow Corrector-- I love this stuff! I've talked about this fab eye brow filler before on my blog, but it's worth a second look. If you don't believe me, ask recent convert Allyson Stagg, who now swears by the number 0 shade. I'm a number 3 girl myself.
MUF Mate Velvet-- I'm pretty happy with this medium coverage, matte finish foundation. It keeps up with me as I work, make meetings and appointments, hit the gym, walk the dog and make dinner.
MUF Flash Palette-- The colors go on beautifully and did really well when I used them with MAC's Invisible Set Powder for body painting. However, I found that they moved and melted when I used them to draw intricate designs. Bottom line is, it's a great palette for body painting, not so much staying power on the face.
Nail File-- It's aight. I've had better.
iHate Products
Advanced Home Active Brazilian Peel
MAC Pro Long Wear Foundation

A beauty blog featuring bridal, celebrity and costume makeup looks, product reviews, maternity paintings, nail art & more. Contact me for an appointment!
Showing posts with label Halloween makeup. Show all posts
Showing posts with label Halloween makeup. Show all posts
Monday, November 21, 2011


Tuesday, November 1, 2011
Monster Bride-To-Be
Halloween was SO much fun this year! Here I am as the Bride of Frankenstein. Dylan found the costume online discounted for $16. I found the wig ($27) at Cinema Secrets in Burbank. This was my first time concealing my own eyebrows, and I got the biggest kick out of it. I feel like if Lady Gaga was to dress up as the Monster Bride, this is what it would look like. Enjoy!


 |
| Lovin on my Lil' Monster |
PRODUCTS USED
Face: Makeup For Ever Mat Velvet foundation, MAC's Studio F/X powder in Lavender
Lower Eye Lid: MAC eyeshadow in Nocturnelle
Upper Eye Lid: Makeup For Ever's Flash Palette in green as base, MAC pigment in Chartreuse, MAC eye shadows in Bitter, Velvet Moss, Femme Noir, MAC Crystalized Yellow Glitter
Eyebrows: concealed with glue stick, covered up with various MAC concealers, and set with MAC Invisible Set Powder. New shape drawn on with MAC Fluidline in Black Track.
Lips: MAC Velvetella lip liner and Cinema Secrets black lipstick.
Face and Neck: Contouring done with MAC's Bark and Scene eye shadows.
Stitches: Makeup For Ever Flash Palette in black
Melted skin effect: Cinema Secrets Flesh Latex and MAC Select Coverup.
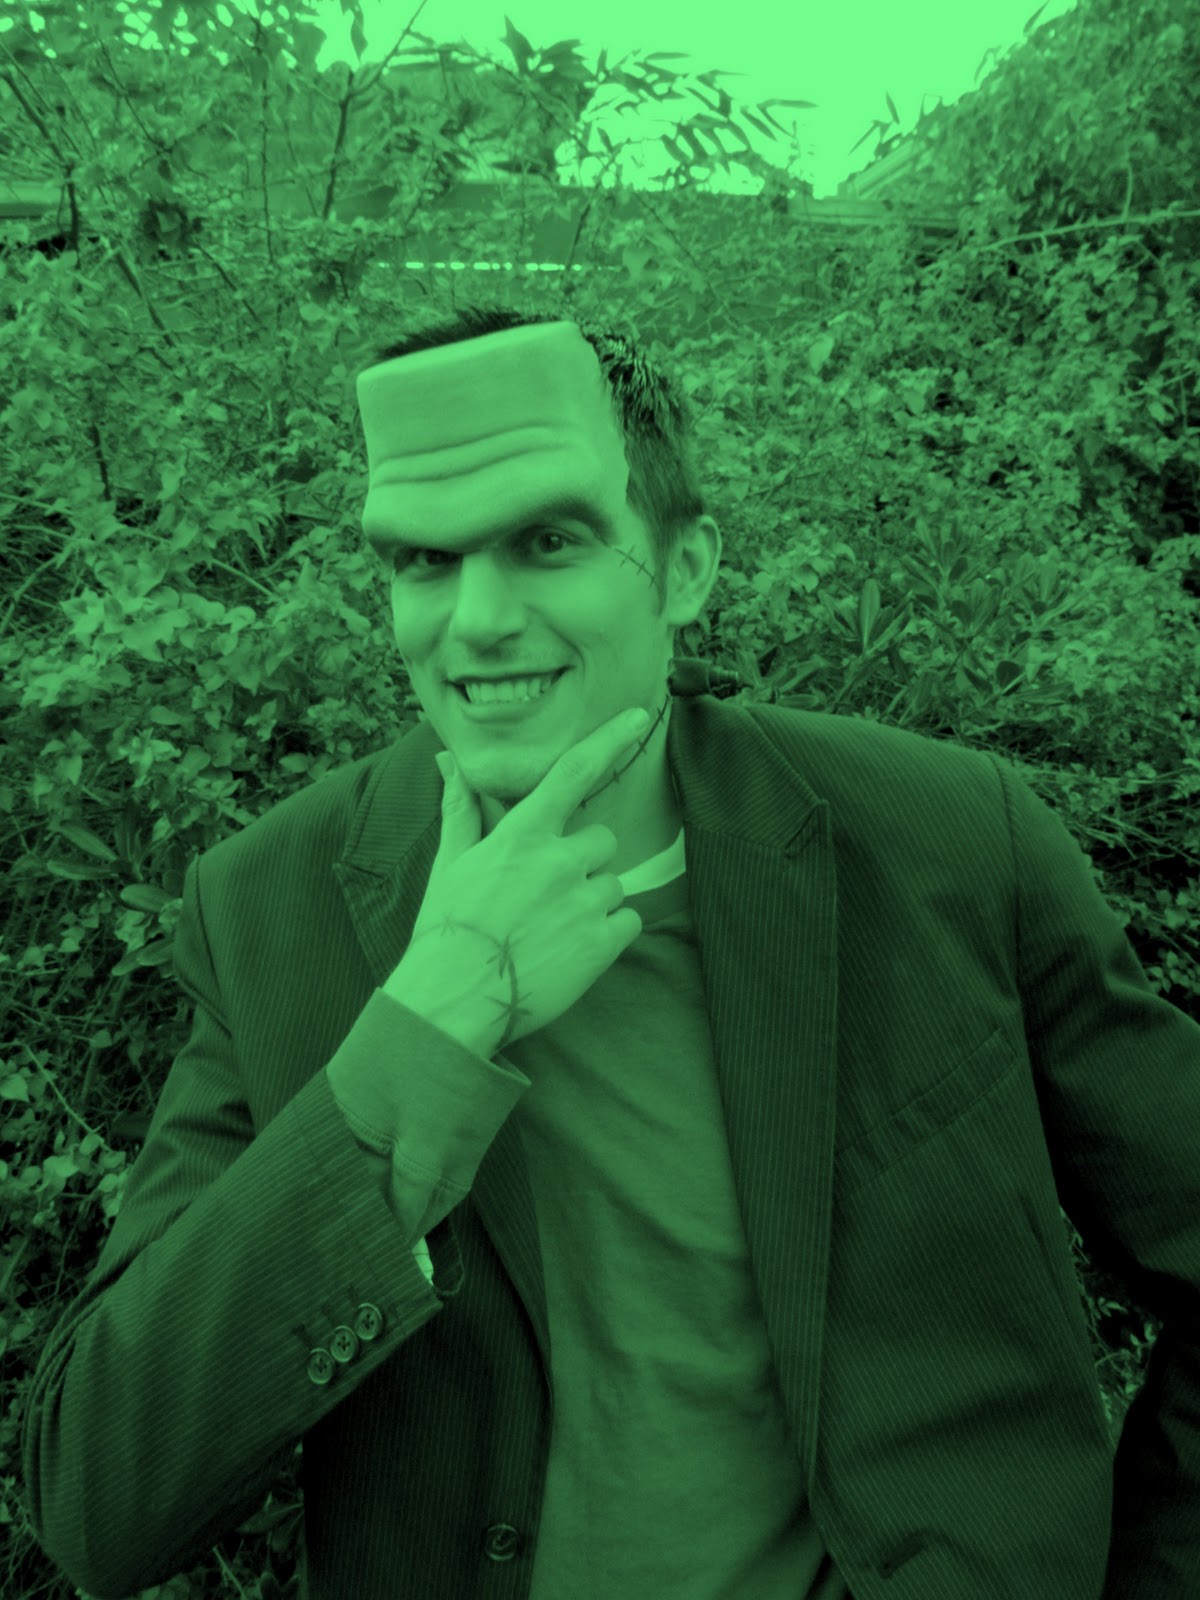
Franken-Fiance
What...a good sport. Right? Here's my monster lover, who was basically the happiest Frankstein I've ever seen. I'm totally swooning at the fact that he allows me to dress him up like this once a year, and doesn't even complain when the makeup takes two days to remove. I didn't have a lot of time, as I had to get both of us ready for a party in the O.C. and my parents were in town helping me with wedding stuff, but here's what I came up with. Enjoy!


 |
| What a looker |
PRODUCTS USED:
Cinema Secrets Cream Makeup Stack in Undead
Woochie monster bolts
Cinema Secrets Frankenstein foam latex prosthetic
Spirit gum
Cinema Secrets Flesh Latex
MAC eye shadows in Swimming, Nocturnelle, Velvet Moss and Femme Noir


Makeup Forever's Flash Palette in black and green
MAC Paint Stick (in the dark purple shade, I forget the name, but it's only sold in Pro stores)
MAC Invisible Set Loose Powder
Monday, October 10, 2011
Dia de Los Muertos
Boo! Here's my Day of the Dead look for my Halloween series. I wanted to do a feminine take on the traditional Dia de los Muertos mask, so I added glitter and made the eye sockets turquoise. It's different than the one I did last year. Click here to take a look. This look was so much fun to wear, I actually waited a few hours to take it off! Below is my tutorial on how to create this look for yourselves. Enjoy!
 |
| Here's the photo I got the inspiration from |


MAC PRODUCTS USED:
White Chromacake
French Violet paintstick
Invisible set powder
Hyper Real FX white powder
Blacktrack Fluidline
Jade Fluidline
Plumage eye shadow
Fuschia glitter
Teal pigment
Teal glitter
Eyeliner Mixing Medium
*All the products above are Pro-only. Plumage eye shadow and the Fluidline eye liners are sold at every MAC.
Wednesday, November 24, 2010
Seein' Spots
Herrow!
Here's a silly video of me rocking my leopard look from last week. There are literally a million photos of my mug! The song is a Muse cover of that old jam "Feeling Good." Hope it makes you laugh, smile and feel inspired. Enjoy...
Here's a silly video of me rocking my leopard look from last week. There are literally a million photos of my mug! The song is a Muse cover of that old jam "Feeling Good." Hope it makes you laugh, smile and feel inspired. Enjoy...
Thursday, November 4, 2010
Zombie/Dead Mermaid
Everyone has been asking how I did the Mermaid Zombie look this past Halloween, so I'll try to explain. (I know...I need to start doing YouTube tutorials).
1) FACE-- I applied a sheer layer of MAC Chromacake "White" all over with Fix + Spray to wet it and a big buffer brush (think Kabuki). Followed by a LIGHT LIGHT dusting of Landscape Green Chromacake. I then took a clean blush brush and buffed in Swimming Eye Shadow (a grass green shade) over all over it. I topped everything off with Invisible Set Powder. Highlighted with Lavender FX Hyper Real/Pressed Powder and contoured with Taupe blush. I went over all the contours with Femme Noir (a black-green eyeshadow) and a crease brush. Be sure to get the inner parts of your eyes, from the top of your eyebrows to underneath the eye. Go around your nostrils and under the lower lip.
2) EYES-- Um, what didn't I have ON my lids?! I'll skip the little stuff here. Various Fluidlines used as bases. Blue Brown Pigment on the top lids, applied WET, with like 5 different shades of dark greens and purples in the crease. Under eyes were also a variety of purples and reds, and I lined the inner rim with Foxy Lady (a true RED eyeliner). Lashes from Sally's, believe it or not.
3) LIPS-- Velvetella creme liner (my FAVE) with Cyber lipstick, and a shimmery burgandy lip glass that was limited. Blood Gel by Cinema Secrets was carefully "dripped" on each corner of the mouth, but not before drawing it out with Velvetella first.
4) CHEST-- I applied the same Chromacake technique to my chest and shoulders as I did to my face, including the contouring. Then I drew a stencil out of canvas paper for the "ribs" and used Femme Noir eyeshadow with a big fluffy brush in between it. You can also get this look from an airbrush machine but A) I was too lazy and B) Who has time to clean an airbrush machine?
5) SCALES-- I used some fishnet stockings as a stencil and patted Ostentatious Fluidline on. Viola! ;)


*All the products (except for the lashes and blood) used for this look are from MAC Cosmetics, many from their Pro line. Click the link in my other mermaid look to find a Pro store near you.
Wednesday, November 3, 2010
Pretty Little Wwwitch!
This is Connie, who was dressing up as a Sexy Witch for Halloween. She requested fantasy eyes, so that's what I gave her. Glitter "Snake" created with Rhinestones & Pearls from the crafts store, and MAC Neon Yellow Glitter (Pro only, see my Mermaid post on where to find a store). Hope you had a bewitching night, dollface!


Armenian Mermaid
Happy Halloween! I hope everyone had a fun weekend. I am EXHAUSTED. And in the next couple of days as I post blogs, you will see why. Friday and Saturday were full of appointments, but they were well worth it. I actually stayed in Sunday, the 31st because I was officially out of steam! This year, I decided to go with the mermaid costume, but I wanted to be my OWN kind of mermaid, not your typical Ariel. I made fish scales on my chest, shoulders and face using fishnets stockings as a stencil. I wanted to look "wet" so I used tons of Light Green Glitter by MAC (only in Pro stores, click HERE to find one near you) You will notice that I took these photos before I put on my lipstick and gloss, but there's a reason for that: I needed to eat a slice of pizza! LOL So please forgive me for my half-done lips...


* Click to make the photos bigger!


Wednesday, July 14, 2010
Dia De Los Muertos
Hi Peeps! Anyone who knows me knows my love for Mexican culture. The food is amazing, the music is inspiring, the language is ancient and the ART is beautiful! I have always been fascinated with the Mexican version of Halloween, "Dia de Los Muertos." I researched a few face masks and found the perfect one I wanted to recreate on my face. Fun, huh?

Check out the slide show below for steps
Monday, September 28, 2009
My Very Own Edward


Till then, enjoy! <3
Subscribe to:
Posts (Atom)